Once you have a custom hierarchy in place, you can configure access control based on it.
To begin, select the lock icon next to the hierarchy to configure access control. Remember that you can only configure access control with a single hierarchy.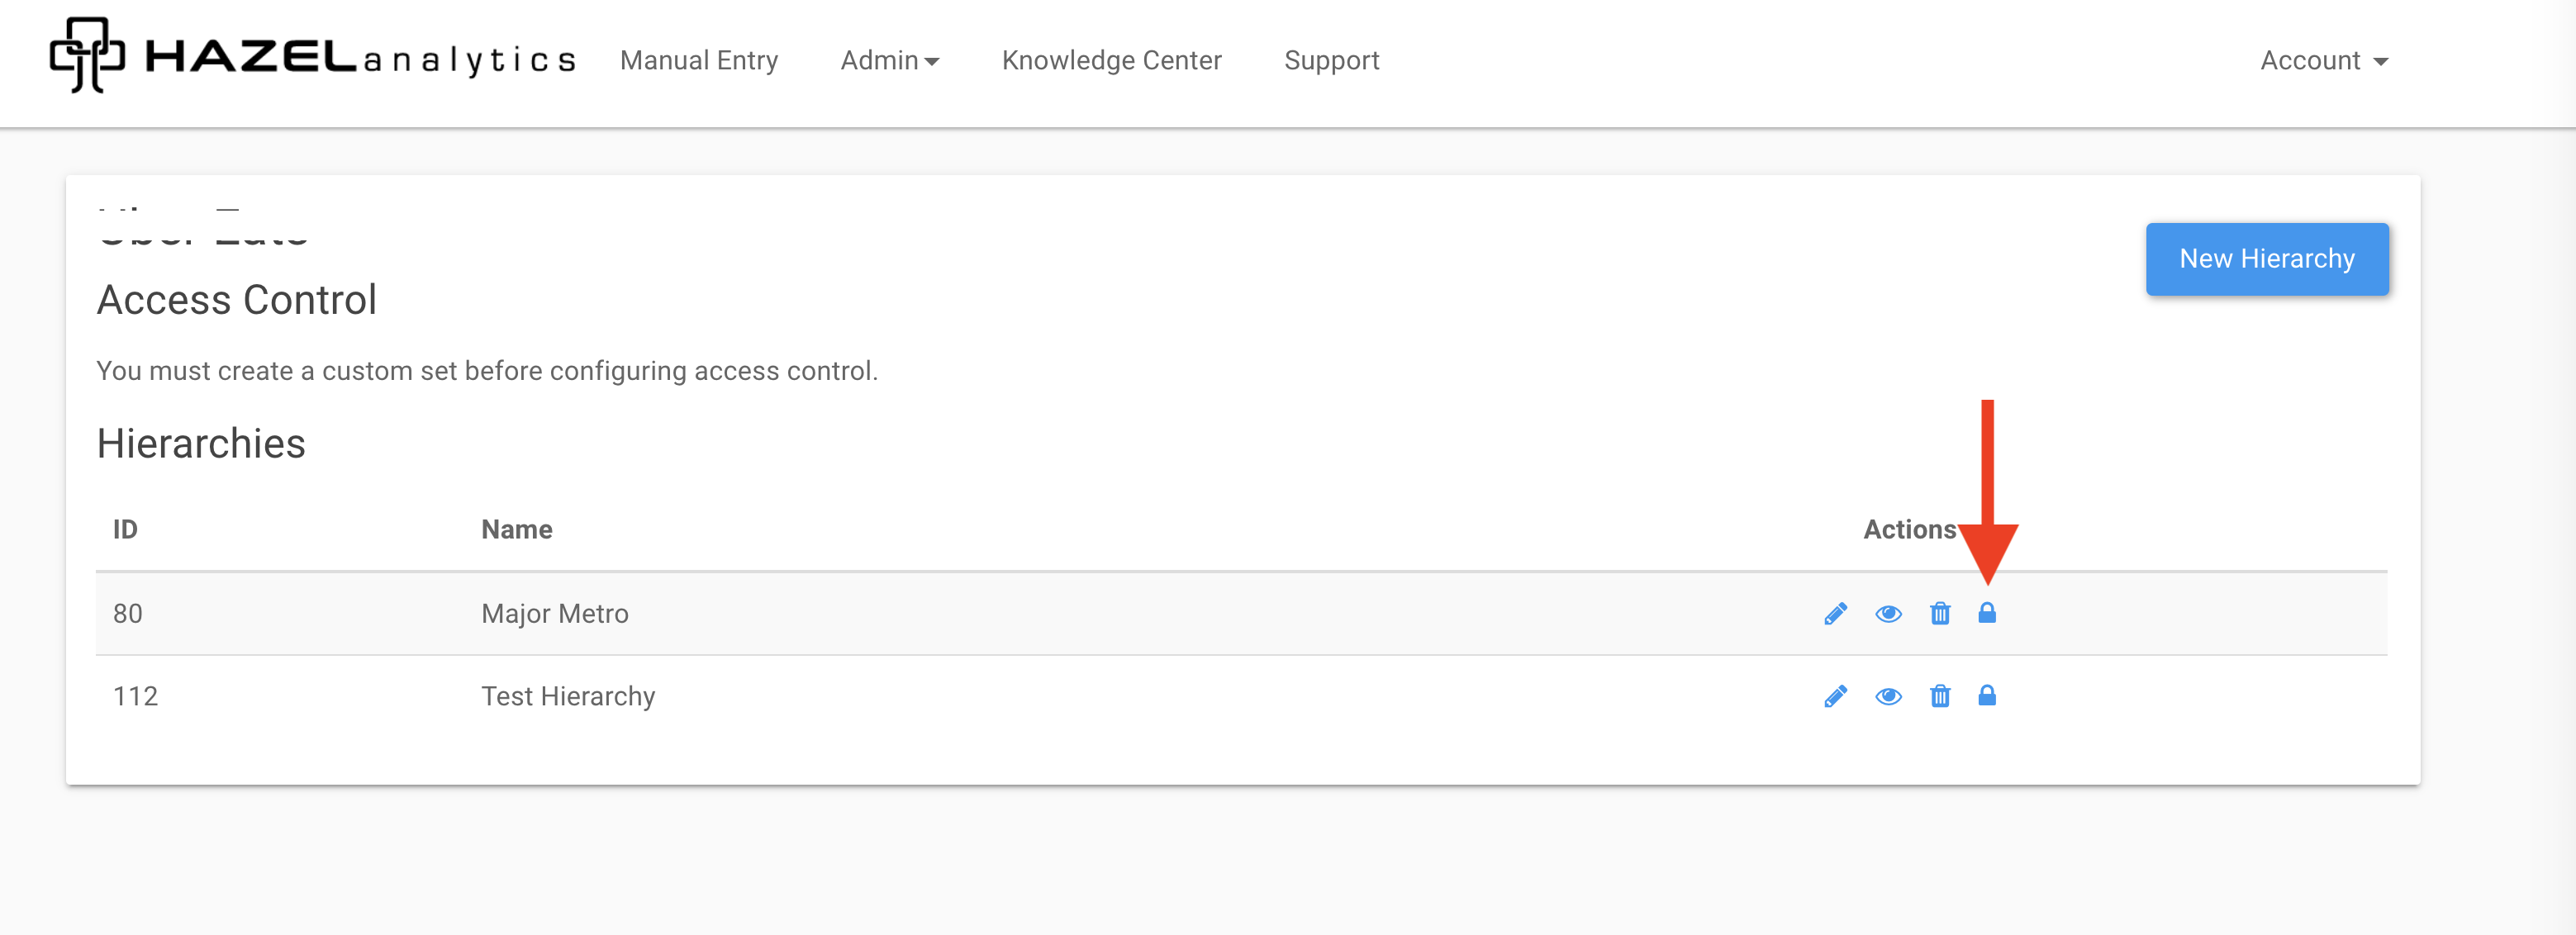
Next, you have the option of making changes to the hierarchy by uploading a new Hierarchy CSV. If you do not need to make changes to the hierarchy, you can leave this field blank.
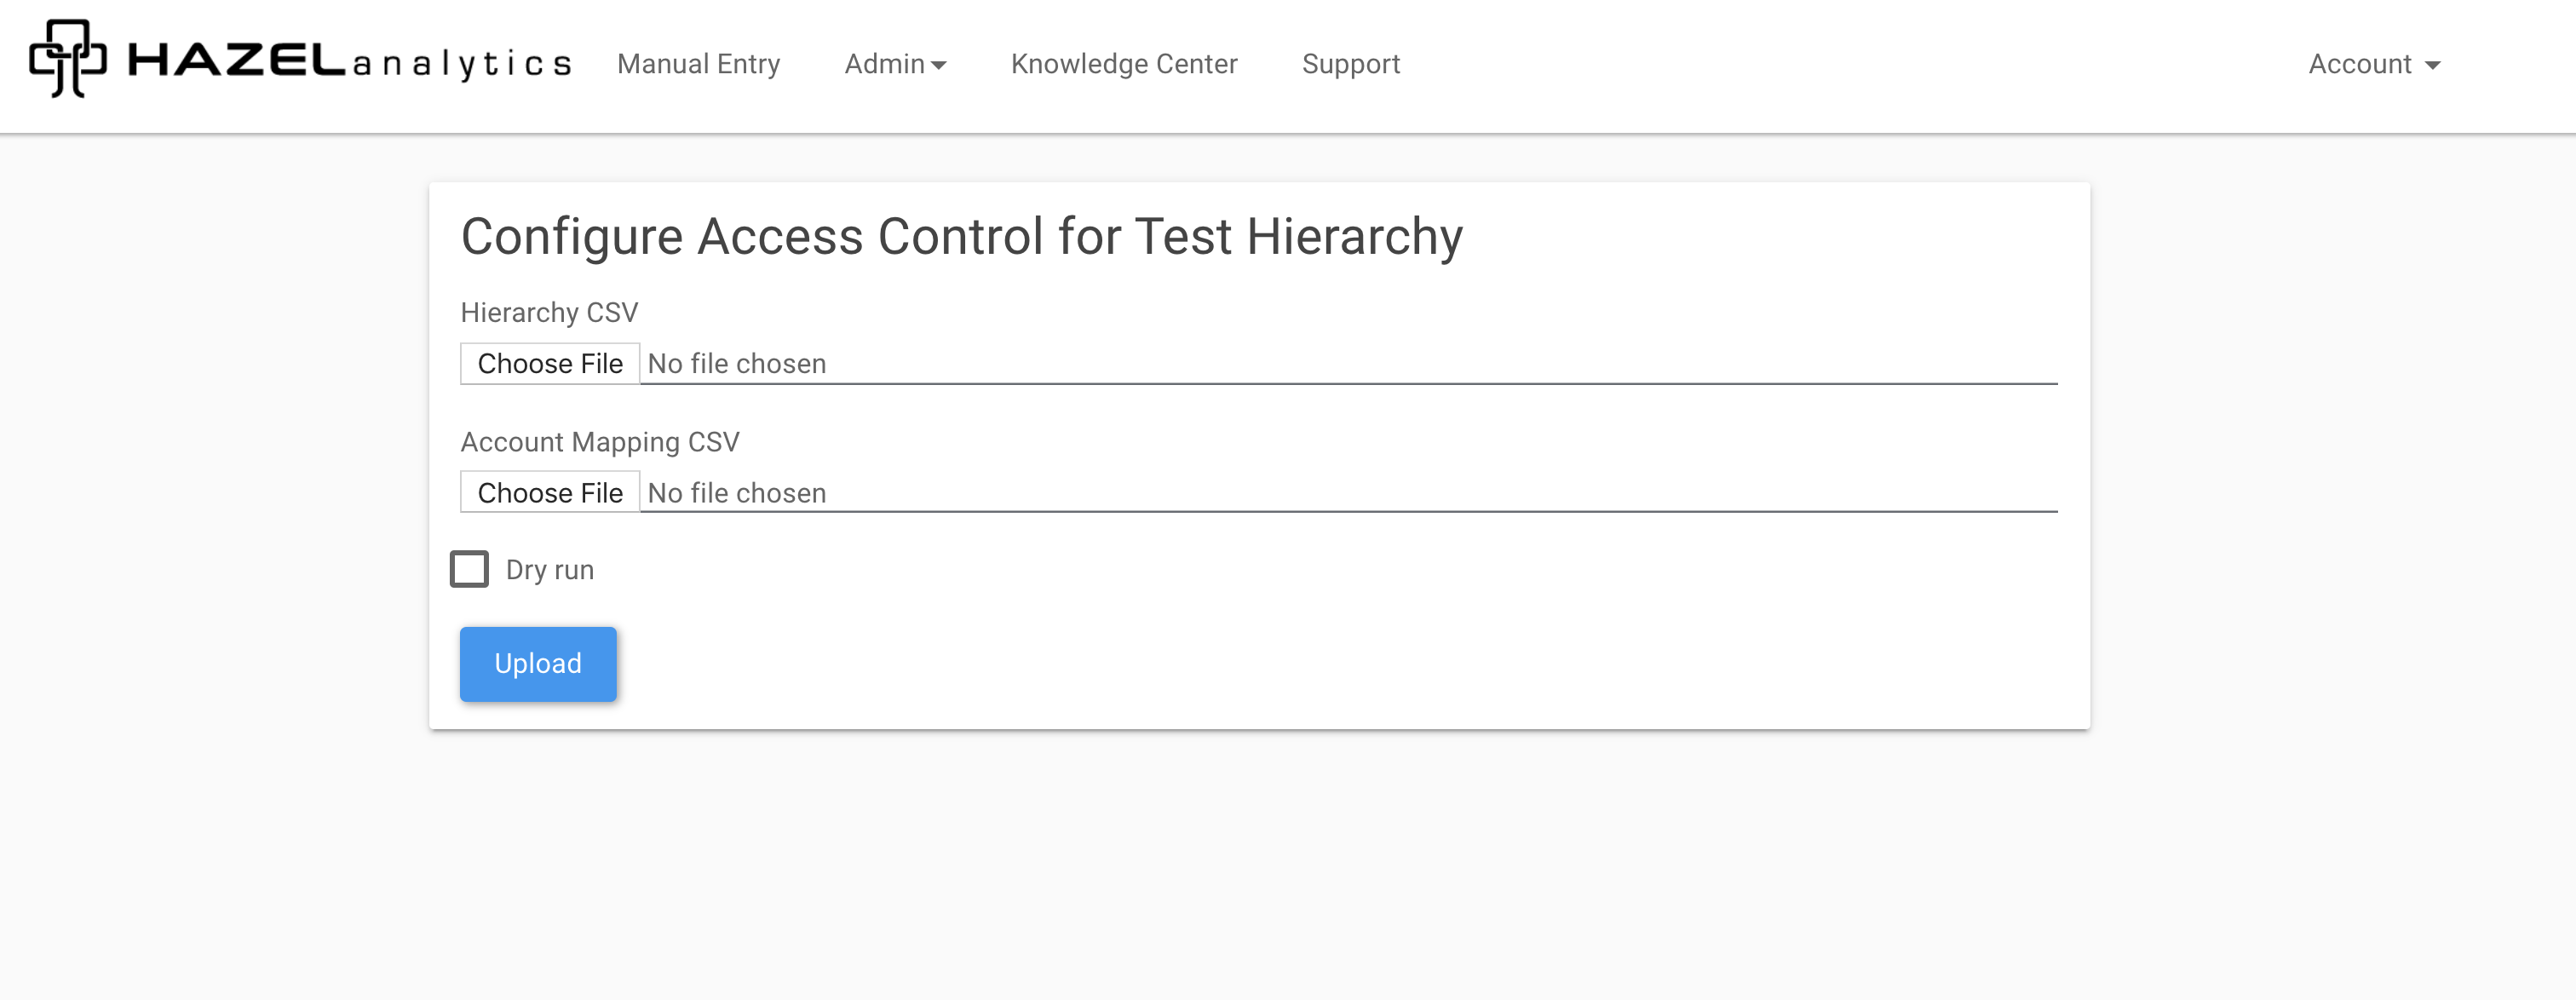
Next, upload an Account Mapping CSV. The format for the Account Mapping CSV is shown below. If you need help with the CSV format, please contact support@hazelanalytics.com.
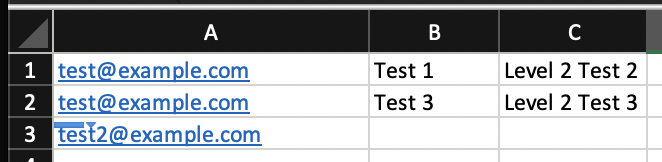
Account email, level 1 node, level 2 node, level 3 node, ... , level n node
In the example below, test@example.com is a limited-access account restricted to the nodes in in rows 1 & 2, while test2@example.com is a full-access account.
Note: you must include all valid user accounts in this upload file. Any accounts associated with a brand that are not included in the account mapping upload will be converted to "No Access" accounts.
When configuring access control, you can select the "Dry run" checkbox to test your account mapping before applying HBAC, which allows you to test your file format for errors before making any changes to account access.
Any errors in account mapping will be displayed with a warning message before implementing access control
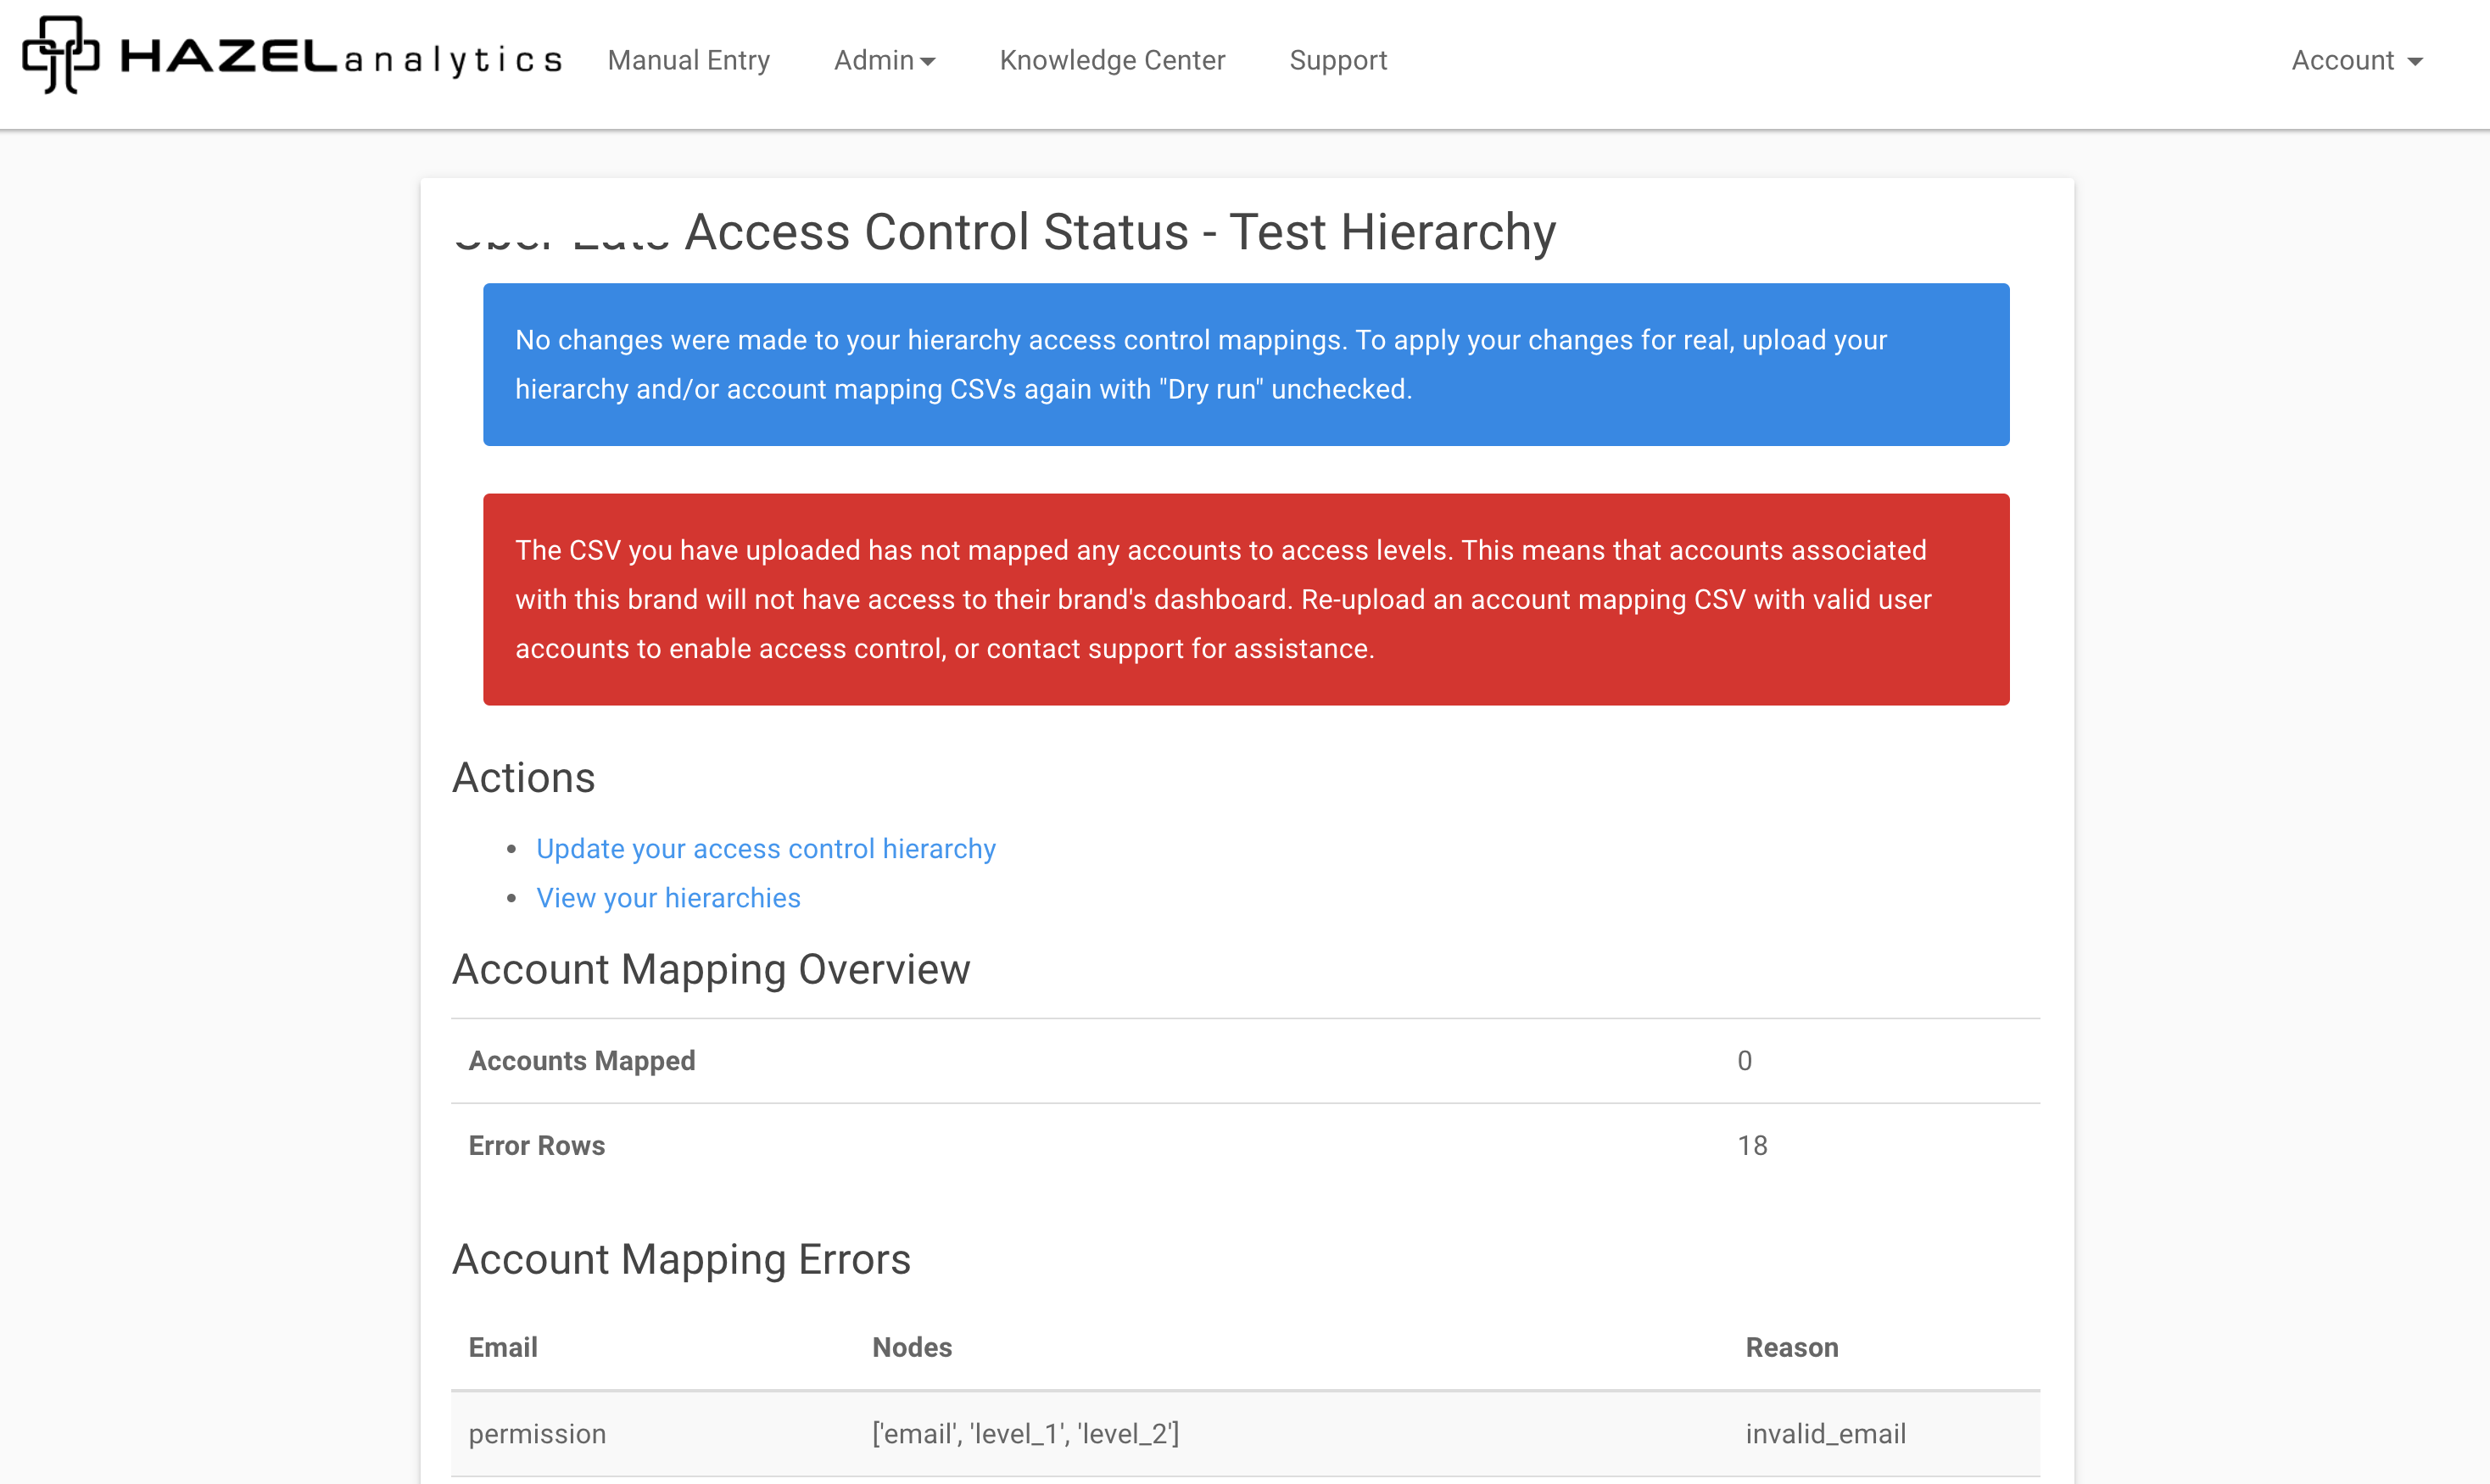
Once access control is configured, you can view the hierarchy, download a verification CSV to check the hierarchy to user account mapping, make changes to access control, or remove access control in the "Actions" column.